 FREE EBOOK
Brush CarePrep, Clean & Maintain Your Chalk Paint Brush
Brush Careprep, clean & maintain your chalk paint brush
Your chalk paint and wax brushes are an investment, so it's important to give them the proper care and maintenance they need to stay in top working condition.
Your chalk paint and wax brushes are an investment, so it's important to give them the proper care and maintenance they need to stay in top working condition.
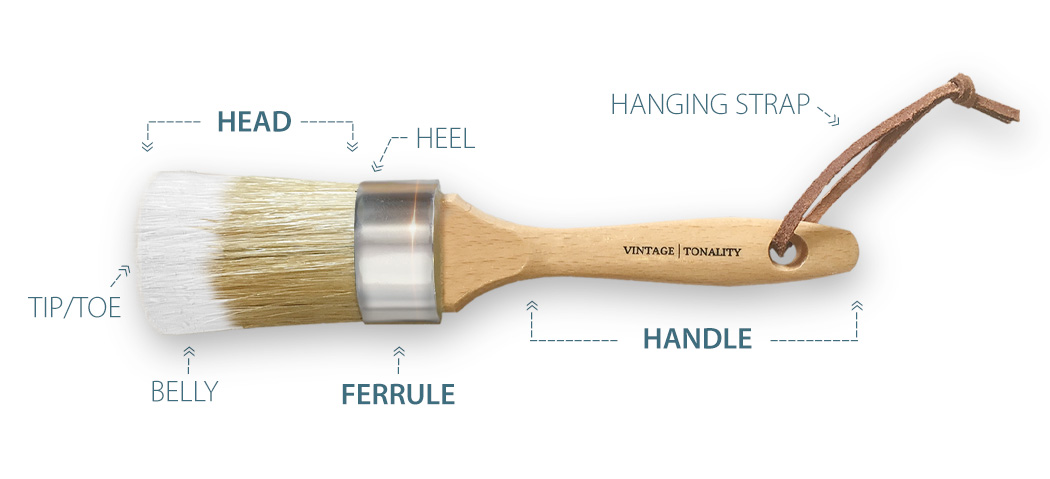
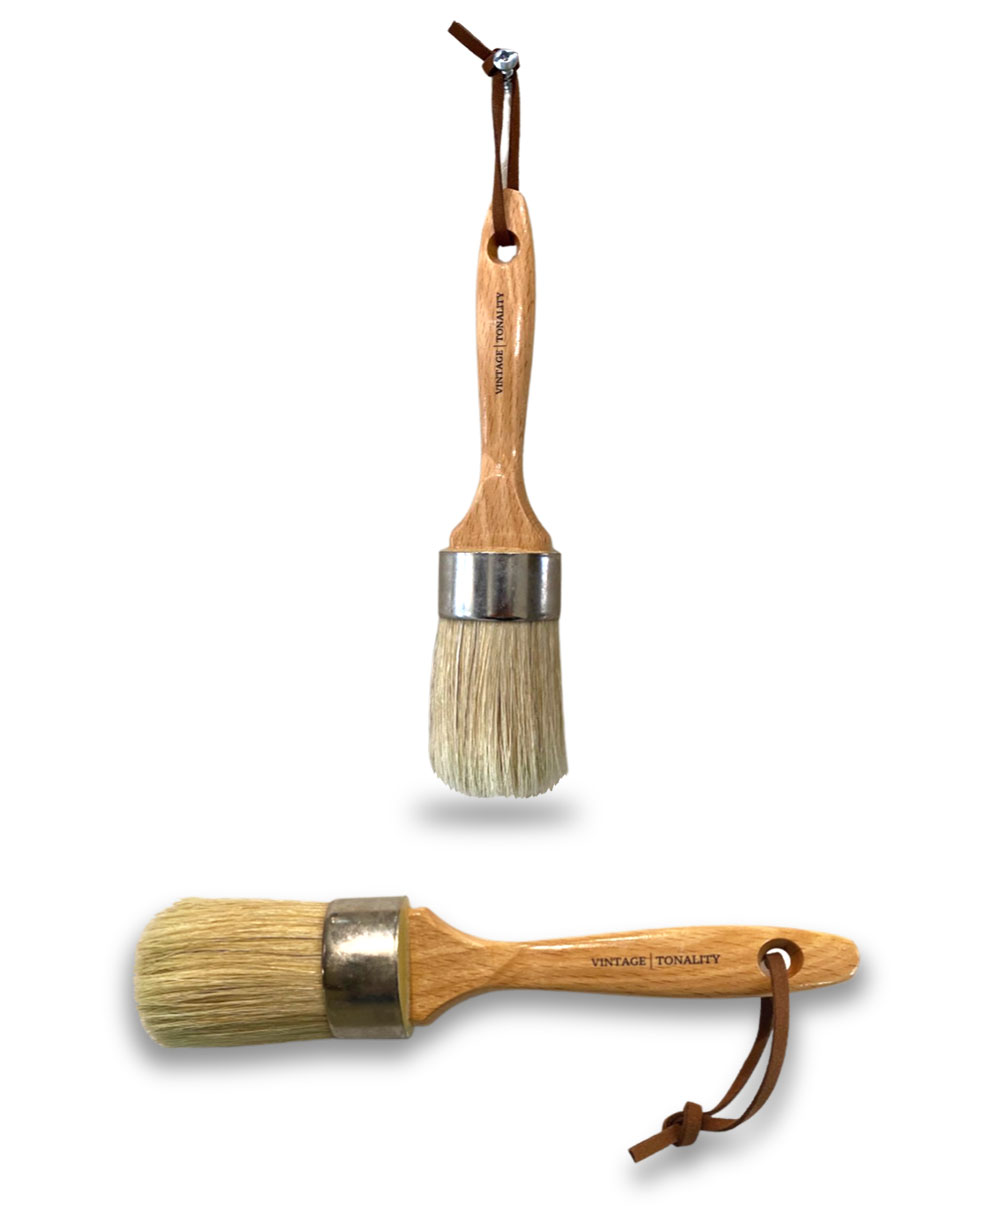
A paintbrush has three (3) main parts: handle, ferrule and head.
Prepare Your Chalk Paint Brush For Painting
Before using your brush it’s important to properly prep the brush to help minimize unnecessary bristle shedding. It’s also worth mentioning that with any new natural hair paint brush it’s perfectly normal to have a few loose bristle hairs, even after prepping. Once your brush has gone through its break-in period bristle loss will be nominal with proper and ongoing maintenance care.
*TIP - If you happen to lose a hair from the brush while painting, we recommend avoiding the use of your fingers to pick off the loose bristle. Instead, use your paint brush to approach the hair at an angle and gently sweep up the loose strand. Then, remove the bristle from your brush head and continue with your painting project.
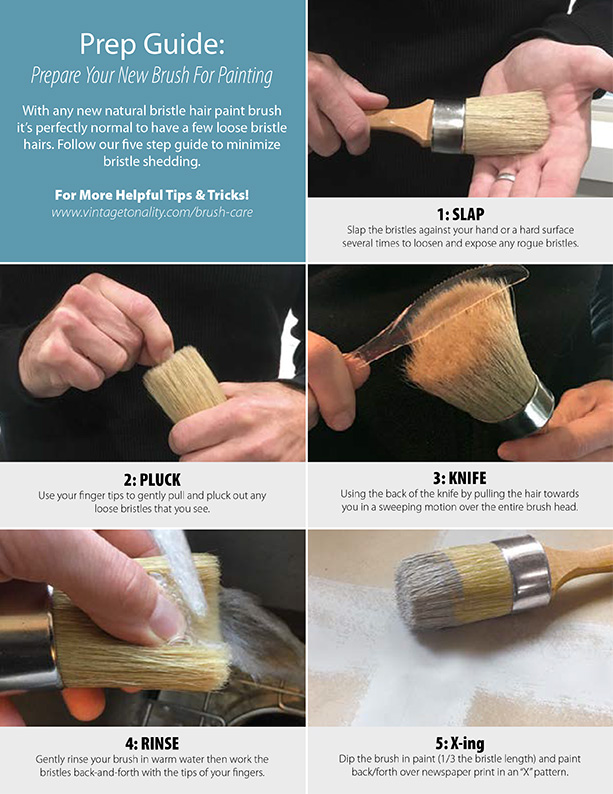
5 Step Guide: How To Break in Your New Chalk Paint Brush.
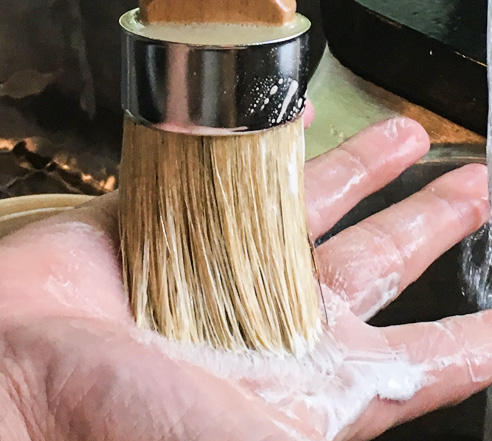
STEP 1 (Slap). Watch Demo Slap the brush head against the palm of your hand several times or firm taps against a hard surface (i.e. table) to nudge upwards any stray bristles. Not a lot of force is required, so use caution to avoid unncessary damage to your brush or impacted surface area.
STEP 2 (Pluck). Watch Demo Using your finger tips, gently pull at the bristles in a plucking manner across the entire head of the brush to remove any visible/hidden loose or stray hairs. We don't recommend twizzers for removing bristles, as they can accidentally damage or loosen perfectly good bristles. Next, examine your brush and remove any bristles that are bent and sticking out by cutting off with a nail clipper.
STEP 3 (Sweep). Watch Demo A simple and quick process that involves using the back (dull side) of a knife, by pulling the hair gently in a repeating sweeping motion over the entire head of the brush. Do this several times to remove any loose hairs and remember to do it gently, but firmly.
*BONUS: The #4 palette knife is included with our Signature Pro Brush Set and Master Brush Set and is ideal for completing this step.
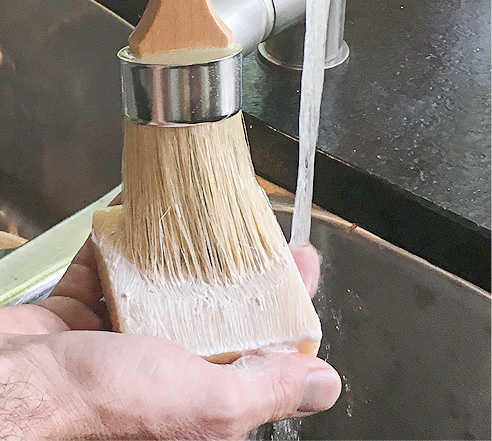
STEP 4 (Rinse & Condition). Watch Demo Rinse your brush under warm water while gently squeezing the bristle hairs and lightly pulling the hairs down from the ferrule to the tips of the brush hairs. Be sure to remove any excess water from the bristle head before painting.
*TIP: If you're not prepared to start painting after Step 4 then we recommend wrapping the bristle head with a cloth or paper towel (see instructions) and allow to dry on a flat surface. This will help your bristles from natually fanning.
For those wishing to soften their bristles, we recommend our Bristle Cleaning and Conditioning Soap during this step (see instructions). The moisturizing soap is included with both our Pro Brush Set and Master Brush Set and also sold separately in our store.
STEP 5 (X-ing). Watch Demo Dip the brush in paint (1/3 of the bristle length) and paint back and forth diagonally over old newspaper print or brown kraft paper in an "X" pattern several times. This step should remove any last remaining or potential loose bristles.
Video: Watch Full Tutorial
How to Prep Chalk Paint Brush
The above video tutorials created by Laura Meyers Design using our 5 Step Brush Prep Guide.
5 STEP BRUSH PREP REFERENCE GUIDE
Grab your own copy for future reference. Follow the five (5) simple steps for the care and removal of loose bristles.
PREVIEW | DOWNLOAD (PDF)
DID YOU KNOW? (Fun Fact)
It's not uncommon for natural hair bristles, like boar hair, to have a slight odor and on the rare occasion a more noticeable scent. This stronger smell can be associated to the natural and also edible ingredient, Camphor (Bhimseni Kapoor), used to clean and eliminate insects and germs found in natural hair. Camphor is derived from trees/plants and has an inherit strong odor. Camphor is also commonly found in popular vaporizer brands for its healing agents. The smell will naturally dissipate over time or after a few rinse and cleaning cycles.
 For those who wish to minimize the smell, we recommend soaking just the bristles (not the ferrule) in vinegar for no more than 15 minutes, then rinse and clean.
*CAUTION: Only soak the bristles, not the ferrule. Submerging the ferrule in vinegar can damage the ferrule and weaken the epoxy securing the bristles in place.
Clean + Condition Your Chalk Paint Brush
Step-by-step instruction on cleaning your chalk paint brushes.
All Vintage Tonality brushes are entirely made from natural double-washed boar bristles. Unlike synthetic brushes, our brushes can hold up to a lot of wear and tear, however, it’s important to point out, just like the real hair on your head, using harsh cleaners (including bleach) will damage your bristles. The overall care for your brush is quite simple and you won’t need anything that harsh to clean your brush.
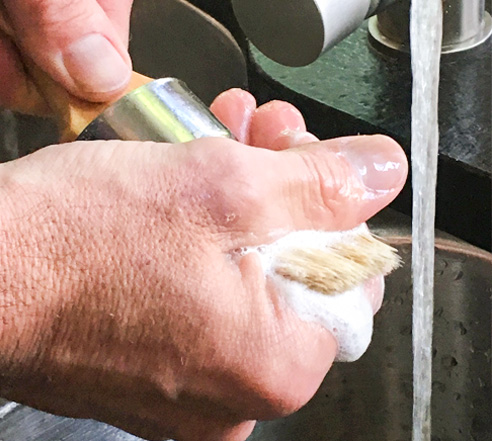
Since chalk paint is water-based you should be able to remove paint and coloring left over on the bristles easily by rinsing them under warm water. Warm water is key in this process. In addition to warm water, apply our cleaning and conditioning soap included with some of our sets. Alternatively, Dawn liquid soap works well too. Now gently work in the soap with your fingers over the entire head of your bristles. Brighter/bolder colors and oil-based paints may take a little more effort on your part, especially if the paint has dried. You can also find additional details on cleaning and maintaining your brushes on our How to Properly Clean Your Chalk Paint Brush page.
Our handmade cleaning and conditioning soap was created especially for our brushes. With ingredients like goat milk, coconut oil, shea butter, lavender, and lye - your brush will keep in top performing shape. Don’t expect a ton of suds, just superior cleaning and conditioning power.
our all-natural handmade soap will clean and condition your brush
Alternatively, a mild grease-cutting dish soap or hair shampoo and conditioners can work well. Over time, the use of standard dish soaps will cause the bristles to dry out and become brittle. If you rinse your brush immediately after painting, just warm water is often enough to do the job effectively. But the use of harsher solvents on your natural bristle hairs will cause unwanted breakage and shedding.
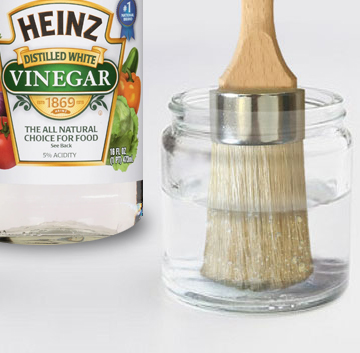
Clean Your Wax Brush.
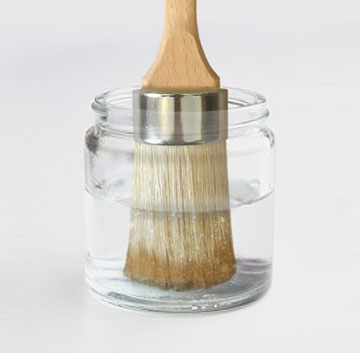
Wipe away any excess wax from your brush. Pour just enough Mineral Spirits into a glass jar to soak the bristles without submerging the ferrule. Allow the brush to soak in Mineral Spirits for about 3 minutes before blotting the bristles with a paper towel. If necessary, repeat the procedure. Once the wax has been thoroughly removed, follow the steps above to clean and condition your brush. Watch Demo
Swish and press the bristles against the bottom of the jar to help dissolve any remaining wax for faster results.
*PLEASE NOTE.
ADDITIONAL CLEANING INFO
It’s important to highlight that natural bristle hair can and will eventually dry out. For the best result and long-standing brush use – after every use apply our Cleaning + Conditioning Soap to prevent brittle bristles.
LEARN MORE »
We strongly discourage soaking your brush in water for any extended period of time and/or submerging the brush’s ferrule under water. Over time this will degrade the epoxy that bonds the hair bristles to the brush, causing bristles to fall out prematurely.
Maintaining Your Chalk Paint Brushes
Drying Your Brush.
Let your brush dry on a flat surface, wrap the bristle head using our cotton cloth, a household rag or a paper towel so the bristles retain their shape. This will also guarantee that water doesn’t continuously drip down to the ferrule, degrading the epoxy that holds your bristles and handle in place. Alternatively, you can drip dry them by hanging them upside down from a hook. Avoid blow drying, they’ll air dry on their own overnight. If you want to start a new project right away, just take a dry clean cloth and squeeze out the excess water.
DO'S
Hang brush with bristles facing downward to drip dry or lay flat on a clean surface to air dry. These drying methods help prevent water from resting on the ferrule and degrading the integrity of the brush.

DON'TS
Drying your brush with bristles facing upwards will allow water to settle in the ferrule and erode the epoxy that binds and holds the bristles in place.
Shaping + Training.
Natural hair bristles will eventually want to fan out over time. To prevent this, we recommend training your brush after every washing. After your brush has been cleaned, gently wrap the bristle-end of your brush using a cotton cloth, tie with string, and allow to dry. This will help train any bristles that want to fan out to straighten up.
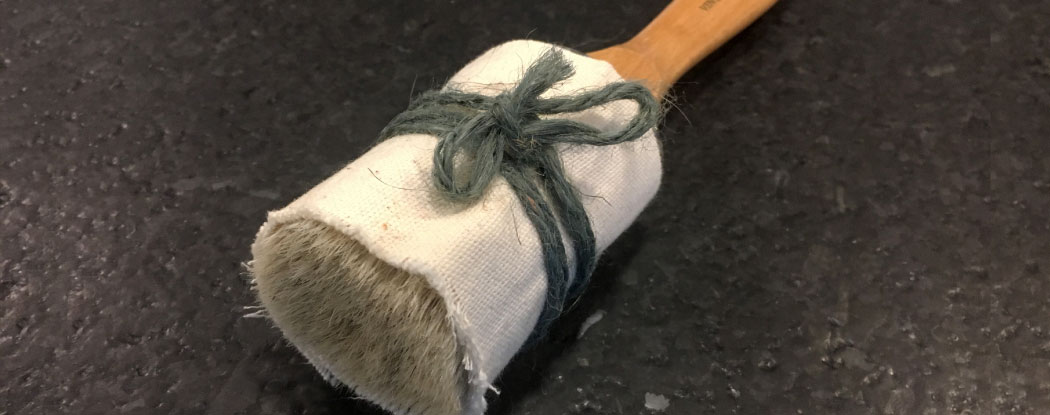
Shaping: After cleaning your brush gently wrap the bristle-end of your brush with a cotton cloth and allow to dry.
Additional Bristle Training Techniques.
After the bristles have nearly dried - use one of these shaping methods to keep your bristles from fanning out.
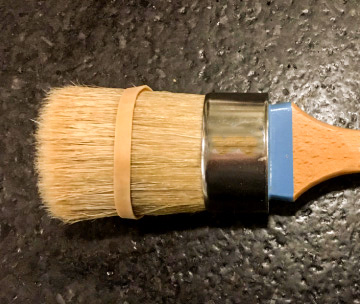
Rubber BandApply a rubber band gently around the head of the brush.

Paper Towel / Clean RagWrap the head with half sheet paper towel or clean household rag.
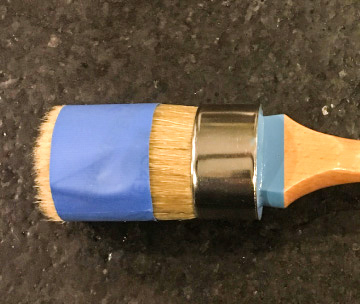
TapeApply masking or painter tape, with the sticky side facing out, around the head of the brush.
Additional Info:
• Download our free eBook guide: How to Prep, Clean and Maintain Your Brushes
• Chalk Painting Basics - The Beginner's Guide To Painting Furniture
• Latest Article - How To Get a Smooth Chalk Paint Finish
• Review our Frequently Asked Questions
© 2015 - 2026 Vintage | Tonality® - All rights reserved. Any unauthorized use, such as distributing, copying, modifying, or reprinting, is not permitted.
Site content protected by: Digital Millennium Copyright Act


